Introduction to Egg Candling
Candling chicken eggs is one of the most fascinating and essential parts of the hatching process. Whether you’re a seasoned poultry farmer or a backyard hobbyist, understanding candling stages helps you monitor embryo development, detect non-viable eggs early, and ensure optimal hatching success.
The term candling originated from using candles to illuminate the interior of eggs. Nowadays, LED lights have taken over, offering better clarity and safety. This article explores the candling process from Day 1 through Day 21 of incubation, ensuring you’re equipped with expert-level insights and step-by-step guidance.
Photo by Duncan Sanchez on Unsplash
Why Candling Chicken Eggs Matters
Candling allows you to:
- Confirm fertility after a few days of incubation.
- Detect early embryo death or bacterial contamination.
- Remove infertile or rotten eggs that could harm others.
- Optimize temperature and humidity for live eggs.
- Reduce unnecessary turning of non-viable eggs.
In short, it improves your hatch rate and protects your incubator’s environment.
What You Need for Candling
Essential Equipment
- A powerful LED egg candler or high-lumen flashlight
- Dark room or a blackout curtain
- Egg holders (optional, but handy)
- Clean hands or gloves
Best Environment for Candling
- Dim or pitch-black room for clearer visuals
- Stable temperature to avoid stressing the embryo
- Quiet environment to minimize movement or dropping risk

Photo by Klaus Nielsen
Safety Guidelines Before You Start
- Never candle for more than a few seconds at a time, especially during early stages.
- Wash your hands to avoid bacteria transfer.
- Handle eggs gently and avoid shaking or rapid movements.
- Always return eggs to the incubator swiftly.
Step-by-Step Candling Timeline
Let’s break down what you should expect day-by-day:
Day 1 to 3: Early Cell Division
- Eggs may appear uniformly opaque.
- No visible veins or embryo—too early.
- Avoid discarding any unless they’re clearly cracked or leaking.
Day 4 to 7: Veins and Heartbeat
- Thin red veins begin to form.
- A small dark spot (embryo) might flicker—this is the heartbeat!
- Unfertile eggs will remain clear.
Day 8 to 10: Movement Begins
- Embryo grows rapidly.
- You may see slight twitching or shifting.
- Veins look stronger and web-like.
Day 11 to 14: Growth Acceleration
- Embryo occupies nearly 50% of the egg.
- More pronounced movements.
- Air sac becomes more defined at the wider end.
Day 15 to 18: Positioning and Shadows
- Embryo shifts toward hatch position (head toward air sac).
- Most of the egg looks dark except for the air cell.
- Less movement due to size.
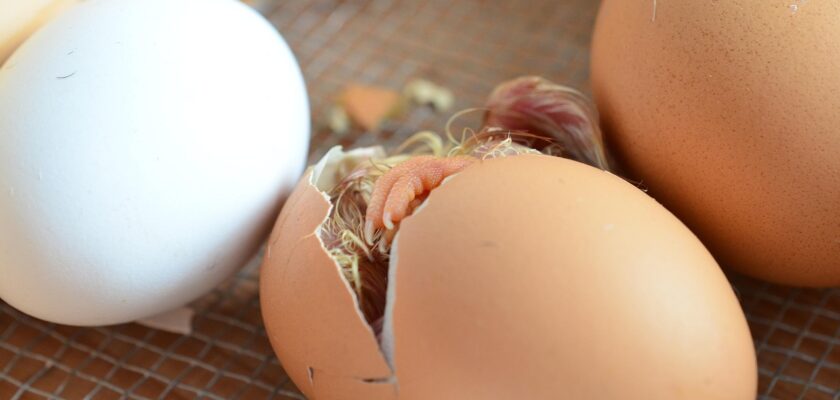
Day 19 to 21: Final Hatching Phase
- Movement slows down dramatically.
- Beak may poke into the air sac (internal pipping).
- Candling should be minimized or avoided.

Photo by Alexas Fotos
Recognizing Signs of a Viable Egg
Look for:
- Strong, spider-like vein structures
- Central movement or pulsing shadows
- Consistent embryo growth based on timeline
- Clear, intact air cell
Identifying Non-viable or Dead Embryos
Red flags include:
- No vein formation by Day 7
- Blood ring around the yolk (dead embryo)
- Cloudy egg or foul smell
- Complete stillness or shrinking air sac
Remove any questionable eggs carefully to avoid contamination.
Common Mistakes in Egg Candling
- Candling too early and discarding viable eggs
- Using weak light sources
- Handling eggs without washing hands
- Candling too often, stressing embryos
- Confusing fertile clear eggs for infertile ones (especially with brown shells)
Tips to Increase Hatching Success
- Candle only on critical days (7, 14, and 18)
- Keep incubator temperature steady (99.5°F for forced air)
- Maintain 40-50% humidity, increase to 65-70% during lockdown
- Turn eggs 3-5 times daily until Day 18
- Keep a candling log with notes on development
How Often Should You Candle Eggs?
Most experienced hatchers recommend:
- First candling: Day 7 (check fertility)
- Second candling: Day 14 (monitor development)
- Final check: Day 18 (before lockdown)
Excessive candling increases handling risks and stresses embryos.
Candling Brown vs White Eggs
- White eggs: Easier to see through
- Brown eggs: Require a stronger candler
- Blue/green eggs (e.g., from Easter Eggers): Intermediate difficulty
Use a high-lumen light for darker eggs and expect to see less detail.
Integrating Egg Candling with Incubation Management
Candling works best when combined with:
- Temperature logging
- Humidity monitoring
- Rotation schedules
- Hatch rate tracking
Use this data to refine your incubation techniques over time.
FAQs
1. Can I candle eggs daily?
Technically yes, but it’s not recommended. Limit it to key developmental checkpoints (Day 7, 14, 18).
2. What if I see a blood ring?
This means the embryo died early. Remove the egg to avoid contamination.
3. How do I know if an egg is infertile?
If it remains completely clear by Day 7 and doesn’t develop veins, it’s likely infertile.
4. Is it safe to candle eggs late in incubation?
Not really. From Day 18 onward, it’s best to avoid handling to let embryos settle for hatching.
5. Why can’t I see anything in a brown egg?
Thicker, darker shells reduce visibility. Use a brighter light and compare development by weight or size.
6. Do all fertile eggs hatch?
Not always. Even fertile eggs can stop developing due to genetics, temperature issues, or mishandling.
Conclusion
Candling chicken eggs is more than just a curious peek inside—it’s a critical tool for improving hatch rates and spotting trouble early. By understanding the day-by-day development process, recognizing viable embryos, and avoiding common pitfalls, you’ll become a pro at managing incubation and producing healthy chicks.